
Resources used for this how to:
➔ VM in ESXi 6.7
➔ Zabbix 4.x
➔ Sistema CentOS 7.x
➔ 2 CPU
➔ 2 GB RAM
You can use VmWare Player, Virtualbox or perform a clean install on a computer.
When you finished a clean install of Centos 7 update de SO:
yum update -y
Now let’s install some very useful packages
yum install wget nano net-tools epel-release -y
- wget (used to download files from internet)
- nano (Text editor)
- net-tools (ifconfig, tracert)
- epel-release ( Extra Packages for Enterprise Linux )
Disabled SELinux edit config file:
nano /etc/selinux/config
and change “SELINUX=enforcing” to “SELINUX=disabled”
# This file controls the state of SELinux on the system.
# SELINUX= can take one of these three values:
#     enforcing - SELinux security policy is enforced.
#     permissive - SELinux prints warnings instead of enforcing.
#     disabled - No SELinux policy is loaded.
SELINUX=enforcing
# SELINUXTYPE= can take one of three values:
#     targeted - Targeted processes are protected,
#     minimum - Modification of targeted policy. Only selected processes are p$
#     mls - Multi Level Security protection.
SELINUXTYPE=targeted
and reboot the VM.
systemctl reboot
Disable firewall temporarily
systemctl stop firewalld
Install rpm from Zabbix website
rpm -Uvh https://repo.zabbix.com/zabbix/4.2/rhel/7/x86_64/zabbix-release-4.2-2.el7.noarch.rpm
yum clean
Install Zabbix server and agent
yum install zabbix-server-mysql zabbix-web-mysql zabbix-agent
Ok, almost there. Now we have to install the database server. We will use mysql.
rpm -Uvh https://repo.mysql.com/mysql80-community-release-el7-3.noarch.rpm
yum install mysql-community-server
When the installation is finished start mysql.
systemctl start mysqld
And enable start on boot for the service.
systemctl enable mysqld
Check if the service is running
systemctl status mysqld
Now get the temporary root password
grep 'A temporary password is generated for root@localhost' /var/log/mysqld.log |tail -1
With mysql installed and running it is time to make the database more secure by setting the root password, removing remote access and so on.
mysql_secure_installation
Securing the MySQL server deployment.

Enter password for user root:

The existing password for the user account root has expired. Please set a new password.

New password:

Re-enter new password:
The 'validate_password' component is installed on the server.
The subsequent steps will run with the existing configuration
of the component.
Using existing password for root.

Estimated strength of the password: 100
Change the password for root ? ((Press y|Y for Yes, any other key for No) : n

 ... skipping.
By default, a MySQL installation has an anonymous user,
allowing anyone to log into MySQL without having to have
a user account created for them. This is intended only for
testing, and to make the installation go a bit smoother.
You should remove them before moving into a production
environment.

Remove anonymous users? (Press y|Y for Yes, any other key for No) : y
Success.


Normally, root should only be allowed to connect from
'localhost'. This ensures that someone cannot guess at
the root password from the network.

Disallow root login remotely? (Press y|Y for Yes, any other key for No) : y
Success.

By default, MySQL comes with a database named 'test' that
anyone can access. This is also intended only for testing,
and should be removed before moving into a production
environment.


Remove test database and access to it? (Press y|Y for Yes, any other key for No) : y
 - Dropping test database...
Success.

 - Removing privileges on test database...
Success.

Reloading the privilege tables will ensure that all changes
made so far will take effect immediately.

Reload privilege tables now? (Press y|Y for Yes, any other key for No) : y
Success.
Create the zabbix DB, in this example we chose the DB name “zabbix” but you can choose differently.
mysql -u root -p
mysql> create database zabbix character set utf8 collate utf8_bin;
Create a user in the the DB to write in the zabbix’s DB. Grant all privileges to the DB and set the user’s password.
mysql> create user 'USER'@'localhost' IDENTIFIED WITH mysql_native_password BY 'YOURPASSWORD!';
Your password must have upper and lower case letters, numbers and special characters
mysql> grant all privileges on zabbix.* to USER@localhost;
mysql> FLUSH PRIVILEGES;
mysql> quit;
Import the Zabbix schema to zabbix DB. This step may take some time so don’t worry.
zcat /usr/share/doc/zabbix-server-mysql*/create.sql.gz | mysql -u USER -p DBNAME
We must edit the Zabbix-server config file in order to connect the DB.
nano /etc/zabbix/zabbix_server.conf
And change the next values
DBHost=localhost
DBName=YOURDBNAME
DBUser=YOURDBUSER
DBPassword=YOURPASSWORD
And edit the zabbix config file to uncomment and change the time zone ( php_value date.timezone ).
nano /etc/httpd/conf.d/zabbix.conf
#
# Zabbix monitoring system php web frontend
#

Alias /zabbix /usr/share/zabbix

<Directory "/usr/share/zabbix">
    Options FollowSymLinks
    AllowOverride None
    Require all granted

    <IfModule mod_php5.c>
        php_value max_execution_time 300
        php_value memory_limit 128M
        php_value post_max_size 16M
        php_value upload_max_filesize 2M
        php_value max_input_time 300
        php_value max_input_vars 10000
        php_value always_populate_raw_post_data -1
        # php_value date.timezone Europe/Riga
    </IfModule>
</Directory>

<Directory "/usr/share/zabbix/conf">
    Require all denied
</Directory>

<Directory "/usr/share/zabbix/app">
    Require all denied
</Directory>

<Directory "/usr/share/zabbix/include">
    Require all denied
</Directory>

<Directory "/usr/share/zabbix/local">
    Require all denied
</Directory>
Almost there. Now, start and enable the zabbix server, zabbix agent and httpd
systemctl restart zabbix-server zabbix-agent httpd
systemctl enable zabbix-server zabbix-agent httpd
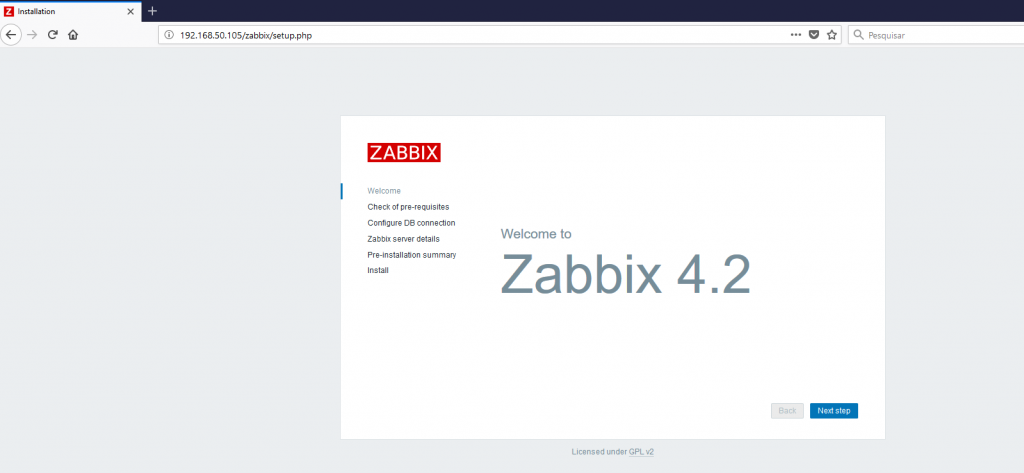
Type the following link in your browser http://IP_ZABBIX_SERVER/zabbix and hit next.
If everything is OK hit next again

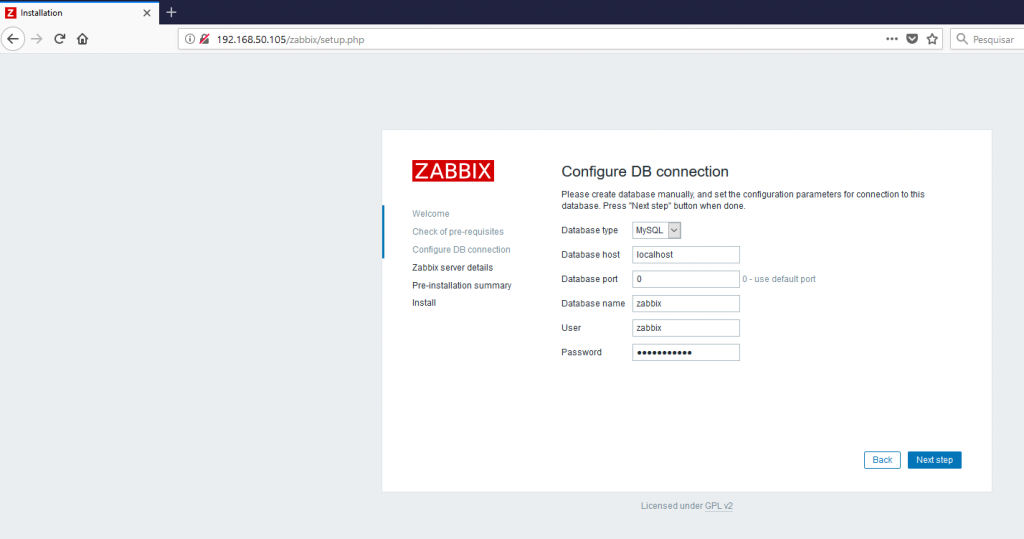
Insert the DB parameters and hit next.
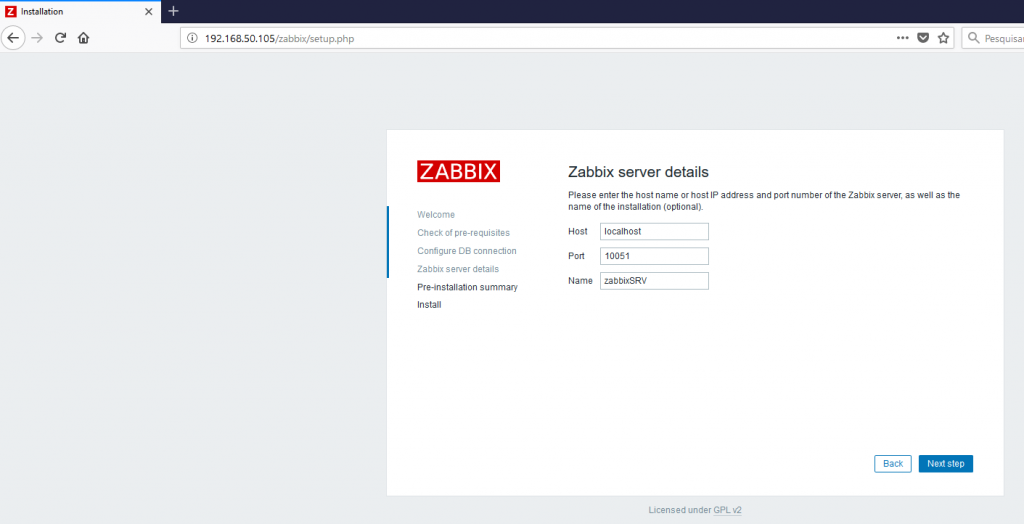
Hit next again. If you need, change the Host and Name fields.
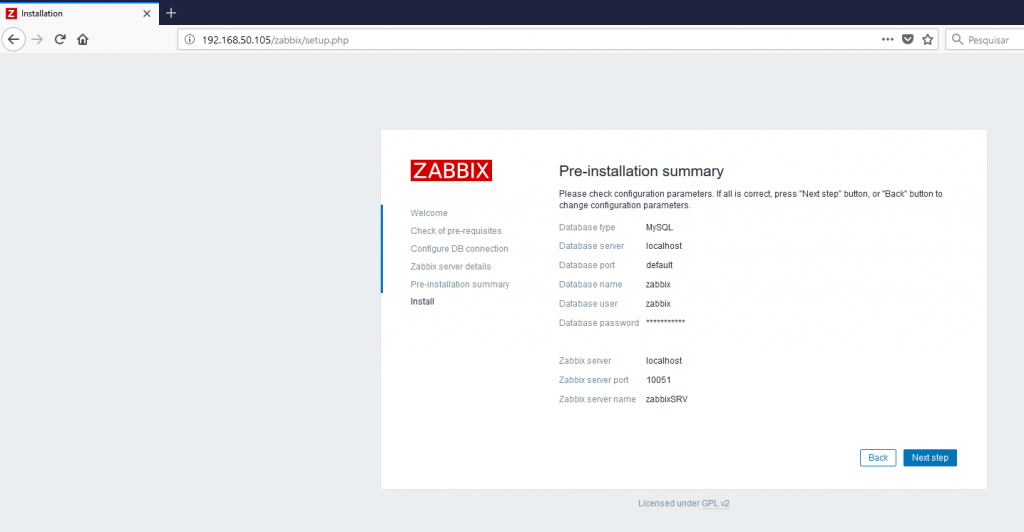
This is the summary of the installation. Hit next.
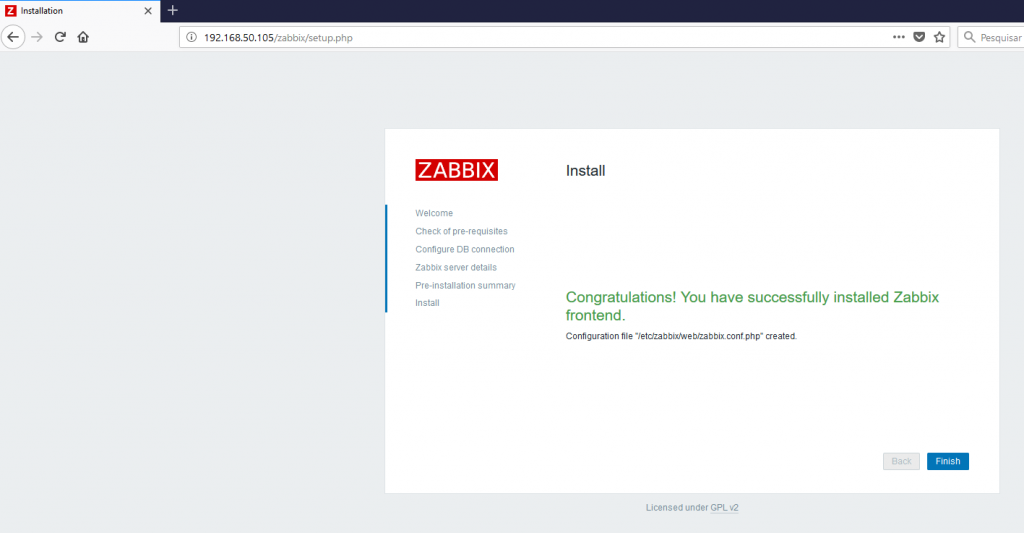
And it’s done, we finished the installation. Hit finish.
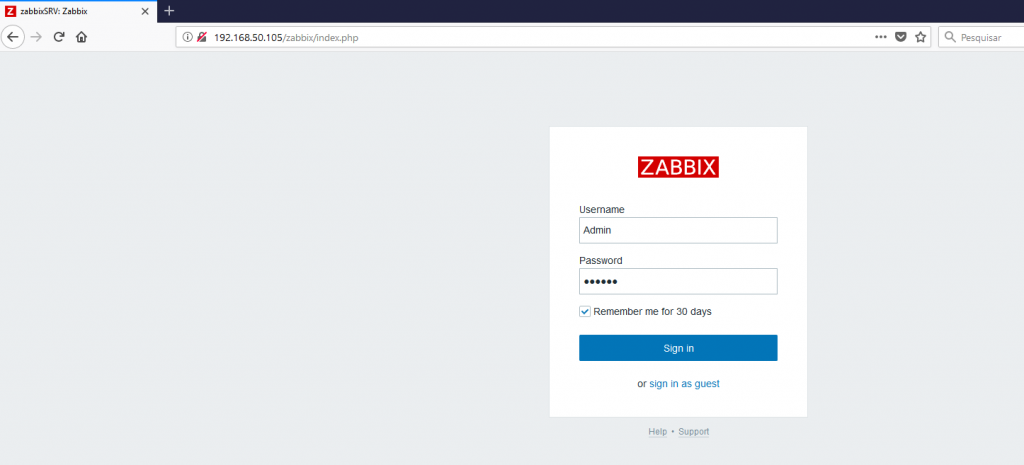
The default zabbix’s User/Password is Admin/zabbix.
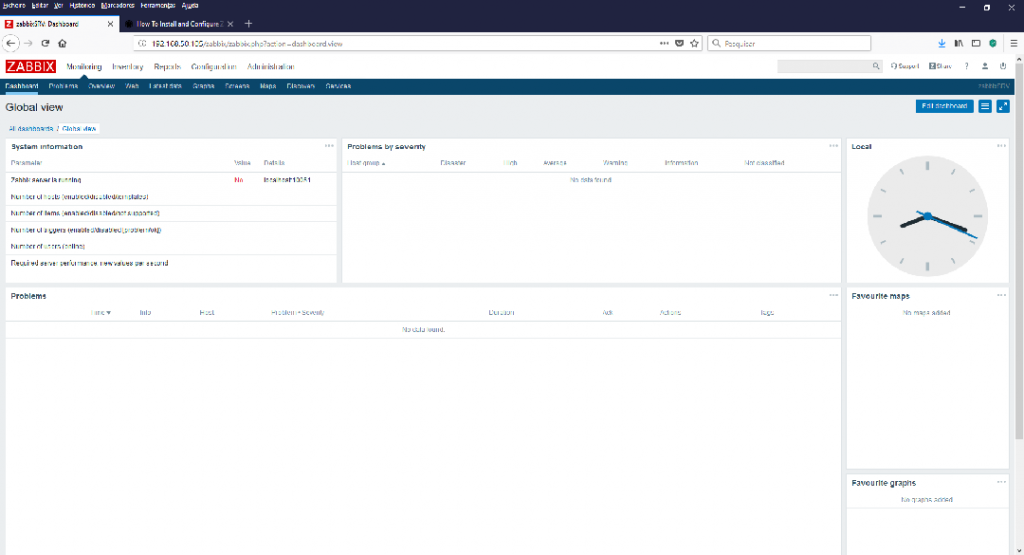
Zabbix’s default dashboard.
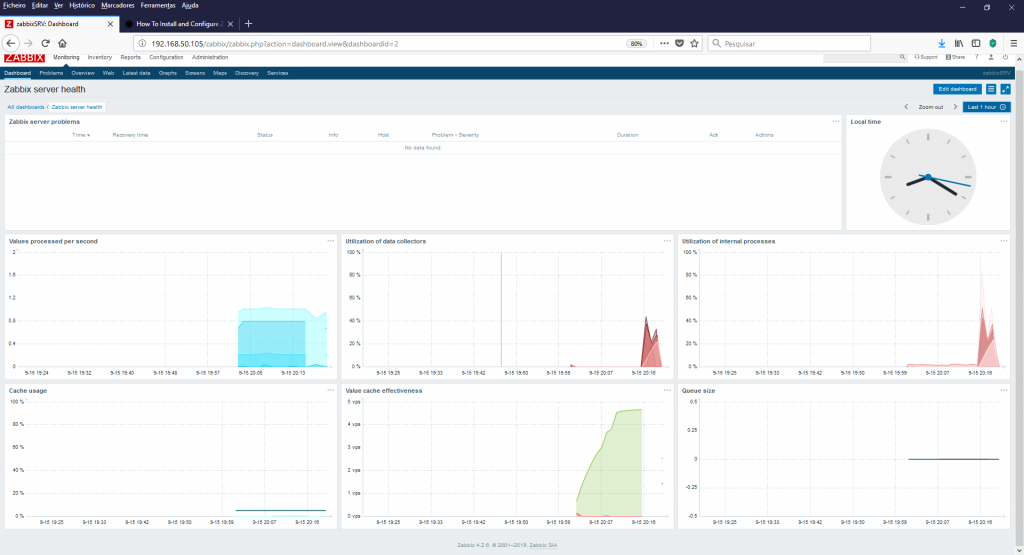
If you click in all dashboards you can choose another Zabbix server dashboard that is already created by default
And Its done!!!